How to Make Acrylic Fridge Magnets: Easy DIY Tutorial
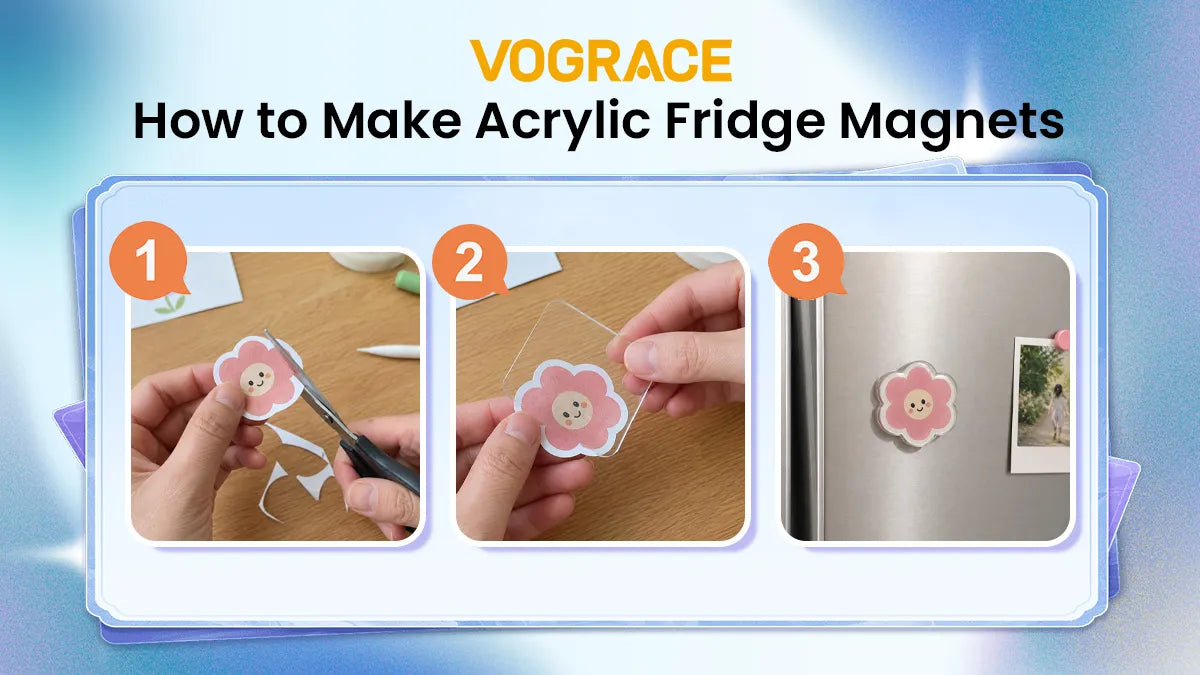
Wondering how to make awesome-looking fridge magnets? Look no further. In this guide, you will learn three different ways of making acrylic fridge magnets right at home.
With just a few simple tools and materials, anyone can make them. Moreover, these magnets are a great DIY project for kids, so make sure to tag them along!
Materials You'll Need
Here are all the materials you'll need to make acrylic fridge magnets at home. All three methods use an acrylic fridge magnet kit, which you can purchase easily through online stores. This kit comes with acrylic blanks (you can choose the shape), adhesive-backed magnets, and double-sided clear tape.
In a few kits, you get adhesive-backed acrylic blanks instead of double-sided tape, but the process to make these fridge magnets is still the same; it's very easy to figure out.
Materials for Method 1: Hand-Drawn Acrylic Magnets
● Acrylic fridge magnet kit
● Acrylic paint pens
● Clear spray sealer
Materials for Method 2: Printed Photo/Design Acrylic Fridge Magnets
● Acrylic fridge magnet kit
● Inkjet printer
● 200 GSM glossy photo paper
● Scissors, craft knife and ruler
● Cutting mat
Materials for Method 3: Vinyl Sticker Acrylic Fridge Magnets
● Acrylic fridge magnet kit
● Inkjet printer
● Printable vinyl sticker paper
● Clear self-adhesive laminate sheets
● Scissors, craft knife and ruler
● Cutting mat
● Cutting machine like Cricut or Cameo (optional)
● Weeding tool (if using a cutting machine and complicated designs)
How to Make Acrylic Fridge Magnets at Home (Step-by-Step Method)
Method 1 is the simplest, method 2 is also on the easier side, and method 3 can be described as moderately difficult. But, if you go with simple designs, making acrylic fridge magnets with vinyl stickers can be easy too.
How to Make Hand-Drawn Acrylic Fridge Magnets

1. Start by removing the protective film on the acrylic blank. If there is any dust, you can use a microfiber cloth to clean it before proceeding to the next step.
2. Using acrylic paint pens, draw your favorite artwork on the blanks. Now is the time to unleash your creativity. Different artwork looks good on different shapes, so make sure to get your acrylic blanks in your desired shapes; the most common ones available are square, round, oval, and heart.
3. Once you're happy with your design, use a clear spray sealer to protect it. Let the sealer dry before handling the acrylic again.
4. Once dry, remove the protective film on the other side of the acrylic blank. Now grab a self-adhesive magnet that comes with your kit, take off its backing paper, and stick it to the acrylic. That is it; your hand-drawn custom-made acrylic fridge magnet is now ready.
This is by far the easiest method among the three, and it also allows you to design it however you want. If you're looking for a personal touch, this is the method you should try first.
How to Make Printed Photo/Design Acrylic Fridge Magnets

Want your fridge magnets to look professional and store-bought? Then this is the method you should definitely try. For this method, a square or rectangle acrylic blank works best.
1. Start by measuring the dimensions of your acrylic using a ruler. Now, open your favorite design software, create a canvas with the same measurement as the acrylic, and import your design or a photo, and make sure to fill the canvas.
2. Most designing programs allow you to create canvases of custom sizes. Just make sure to select inches, mm, or cm as units before adding the width and height. Also, make sure to use a resolution of 300 DPI for the best print quality.
3. Export your design as a "PNG" or "JPG." If you're using Canva, you can also export it as a "PDF Print" file for high-quality printing. Canva doesn't provide a direct option to manually set 300 DPI, but the "PDF Print" export still gives you good quality.
4. Load your photo paper into your inkjet printer, and print the design using the "Actual Size" or "100%" option depending on your printer model. This prints the design in the exact dimensions and fits on the blank perfectly.
5. Place the printed paper on a cutting mat, and use a ruler and a craft knife to carefully cut the photo or the design.
6. Next, prepare your acrylic blank by removing the protective film off one side. Grab a double-sided clear tape, peel off its backing paper on one side, and stick it to the acrylic blank.
7. Now, peel the backing paper off the other side of the double-sided tape and stick your photo onto the adhesive side, with the photo facing the acrylic blank. Yes, the photo goes behind the acrylic, creating a cool see-through effect when viewed through the blank.
8. Grab an adhesive-backed magnet, take off its backing paper, and stick it to the back side of the photo. Finally, peel the protective layer on the front side of the acrylic, and your custom-made acrylic fridge magnet is ready to use.
How to Make Vinyl Sticker Acrylic Fridge Magnets

This method gives the acrylic fridge magnet a clean, glossy, professionally printed look with a subtle raised effect.
1. Start by creating a canvas the same size as your acrylic blank, import your design, and export it as a high-quality file. Refer to Steps 1-3 of the Printed Photo/Design method above to learn how.
2. Load the printable vinyl sticker paper into your printer, and print using the best quality settings. If you have a cutting machine, like a Cricut or Cameo, you can definitely go with complicated designs because the machine does all the cutting for you. But if you're going with a pair of scissors and a craft knife, use a simple design that you can cut by hand.
3. Wait for the ink to completely dry, and then grab a sheet of self-adhesive clear laminate and apply it on the printed sticker paper. Printable vinyl sticker paper is tear-resistant and waterproof, but the laminate is to protect the ink.
4. Load your laminated sticker paper into the cutting machine, upload the design to the machine's software, and cut accordingly. If using scissors and a craft knife, place the sheet on a cutting mat and cut carefully.
5. Ready your acrylic blank by removing the protective film on one side; grab your design, peel off its backing paper, and stick the design carefully on the acrylic.
6. Finally, remove the protective film on the other side of the acrylic, remove the backing paper off an adhesive-backed magnet, and stick it, and you're done!
Make Custom Acrylic Fridge Magnets With Vograce

If you like making acrylic fridge magnets but don't want to make every piece yourself, Vograce is another option. You can upload your own artwork and turn it into custom acrylic magnets with different size, quantity, and finish options.
This is especially useful if you want to make several magnets at once or need a more polished result without printing, cutting, and assembling everything yourself. You can simply upload your design, choose the options you want, and order your finished magnets from Vograce.